
Tie-dyeing is a fun and creative way of making your dull sweatshirt lively and vibrant. With easy steps and readily available materials, you can transform an old, boring sweatshirt into a fashionable piece of clothing with unique designs that reflect your personality.
Whether you are trying tie-dyeing for the first time or have been doing it for a long time, this article will guide you on how to create a beautiful sweatshirt through easy steps. This article provides tips for choosing the right materials, preparing the sweatshirt for dyeing, creating different designs using simple techniques, and finishing off the final product.
So why not add some color to your wardrobe by tie-dyeing a sweatshirt? This article has everything you need to know to make it an enjoyable and successful experience. You will learn how to create different types of tie-dye patterns, such as spiral, stripes, and bull’s eye, and the best ways to treat your sweatshirt to ensure the colors remain vibrant even after washing.
Don’t miss out on the chance to express your creativity and make a statement with a unique tie-dyed sweatshirt. Follow the easy steps in this article and get ready to impress your friends and family with your colorful masterpiece!
“How To Tie Dye A Sweatshirt” ~ bbaz
Introduction: The Art of Tie-Dyeing
Tie-dyeing is a popular art form that allows individuals to express their creativity through the use of vibrant colors and unique designs. It’s an enjoyable way to give an old sweatshirt new life and make a statement with your fashion sense.
Materials Needed for Tie-Dyeing
Before starting your tie-dye project, it’s essential to gather all the needed materials. These include:
| Materials | Description |
|---|---|
| Sweatshirt | A plain cotton sweatshirt, preferably white or light-colored |
| Dye | Tie-dye kit with various colors |
| Buckets | Large plastic buckets for dyeing |
| Rubber bands | To create different tie-dye patterns |
| Protective gloves | To keep your hands clean and protected from dye stains |
Preparing the Sweatshirt for Dyeing
Before you begin tie-dyeing, it’s crucial to prepare the sweatshirt correctly to achieve the best results. This involves washing the sweatshirt to remove any dirt, dust, or stains and drying it before applying the dye. It’s also recommended to iron the sweatshirt to ensure it’s smooth and ready for dyeing.
Creating Different Tie-Dye Patterns
One of the benefits of tie-dyeing is that there are several different patterns to choose from, allowing you to create a unique design that reflects your personality. The most popular tie-dye patterns include:
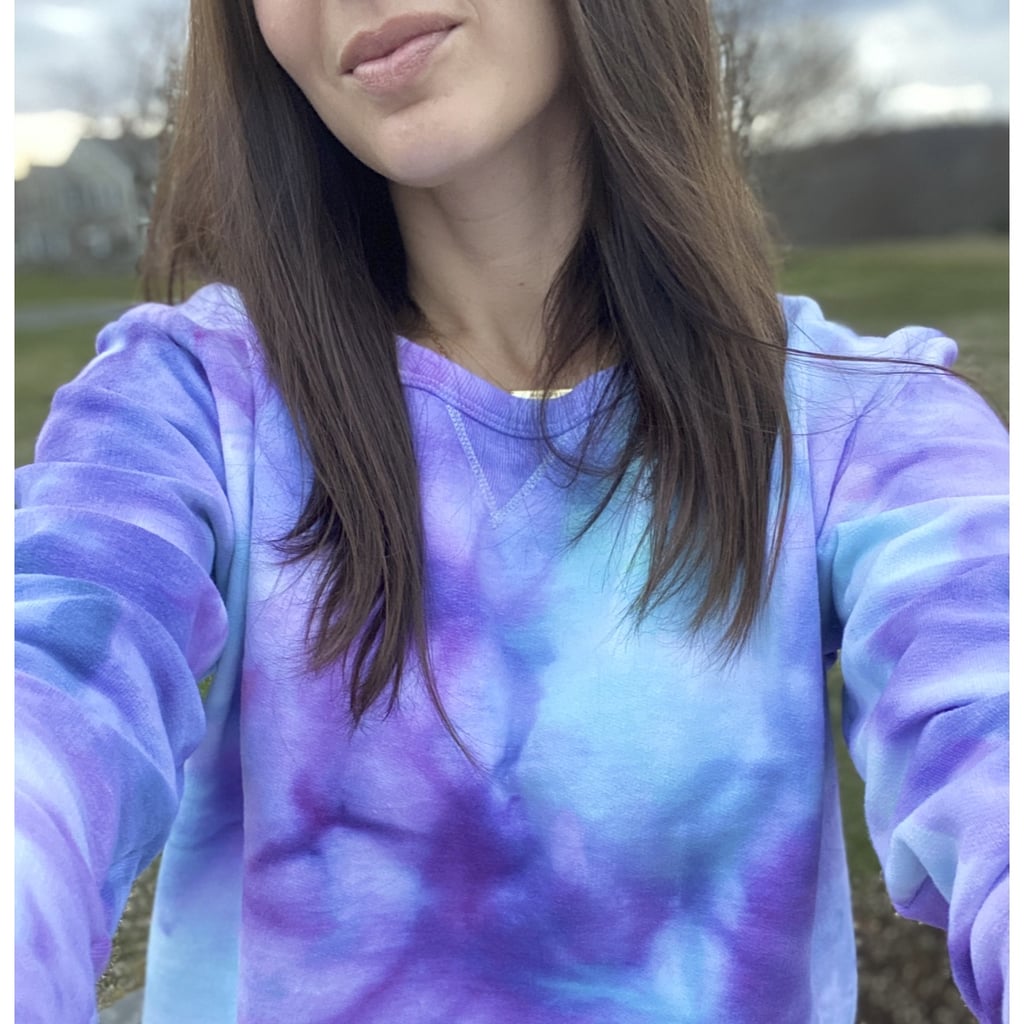
Spiral Pattern
This pattern involves twisting the sweatshirt into a spiral shape and securing it with rubber bands before dyeing. The resulting design is a beautiful swirl of colors.
Stripes Pattern
The stripes pattern involves folding the sweatshirt in a zig-zag pattern and securing it with rubber bands. This pattern creates a striped effect on the sweatshirt.
Bull’s Eye Pattern
The bull’s eye pattern involves folding the sweatshirt in half, then in half again, and securing it with rubber bands. This pattern creates a circular design on the sweatshirt.
Dyeing the Sweatshirt
Once you have chosen your tie-dye pattern, it’s time to apply the dye. Follow the instructions provided in the tie-dye kit to mix the dye and apply it to the sweatshirt. It’s essential to wear protective gloves during this process to prevent the dye from staining your hands.
Finishing the Tie-Dye Project
After applying the dye to the sweatshirt, it’s crucial to let it set for the recommended time before rinsing it out. Rinse the sweatshirt under cold water until the water runs clear, then wash it separately in the washing machine using cold water and a mild detergent. It’s recommended to air dry the sweatshirt to prevent any color bleeding or shrinkage.
Conclusion: Express Your Creativity with Tie-Dyed Sweatshirts
Tie-dyeing is an exciting and creative way of transforming a plain sweatshirt into a colorful masterpiece. By following the simple steps outlined in this article, you can create unique tie-dye designs that reflect your personality and style. Don’t be afraid to experiment with different patterns and colors to create a one-of-a-kind sweatshirt that will impress your friends and family.
So, grab your tie-dye kit, gather your materials, and get ready to make a statement with your fashion sense!
Easy Steps for Tie-Dyeing a Beautiful Sweatshirt at Home
Dear valued blog visitors,
We hope that you enjoyed reading our article about easy tie-dyeing steps, and that it inspired you to try out this fun and creative activity at home. As you learned, tie-dyeing a beautiful sweatshirt is a simple process that only requires a few basic materials, such as dye, rubber bands, and a plain sweatshirt. By following the steps outlined in our article, you can create unique and eye-catching designs that are sure to impress your friends and family.
Remember, tie-dyeing is all about having fun and being creative. You don’t need any special skills or experience to get started, just a willingness to experiment and try new things. So why not grab some friends, some sweatshirts, and some dye, and have a tie-dye party? You’ll be amazed at how much fun you can have, and how beautiful your creations can be.
Thank you for visiting our blog, and we hope that you will continue to explore our site for more articles and tips on a variety of topics. If you have any questions or feedback, please feel free to contact us – we always love to hear from our readers!
Easy Steps for Tie-Dyeing a Beautiful Sweatshirt at Home
If you’re looking to add some color and personality to your wardrobe, tie-dyeing is a fun and easy way to do it! Here are some common questions people ask about tie-dyeing a sweatshirt at home:
1. What supplies do I need for tie-dyeing?
- A white or light-colored sweatshirt
- Tie-dye kit (includes dye, gloves, rubber bands, and instructions)
- Plastic bags or plastic wrap
- Spray bottle filled with water
- Bucket or sink
2. How do I prepare the sweatshirt for tie-dyeing?
- Wash the sweatshirt in cold water without fabric softener to remove any dirt or chemicals that may interfere with the dye.
- Dampen the sweatshirt with water before tie-dyeing to help the dye absorb better into the fabric.
- Decide on the pattern you want and use rubber bands to tie sections of the shirt together. You can use different techniques like the swirl, stripes, or bullseye patterns.
3. How do I apply the dye?
- Put on the gloves provided in the tie-dye kit to protect your hands from getting stained.
- Mix the dye according to the instructions provided and pour it into a spray bottle or squeeze bottles for easy application.
- Saturate each section of the sweatshirt with the dye, making sure to flip over the sweatshirt and apply dye to both sides. Use different colors for each section if desired.
- Put the sweatshirt in a plastic bag or wrap it in plastic wrap to keep it moist while the dye sets. Leave it for 6-8 hours or overnight.
4. How do I rinse and dry the sweatshirt?
- Remove the rubber bands and rinse the sweatshirt in cold water until the water runs clear.
- Wash the sweatshirt separately in cold water with a mild detergent and rinse well.
- Dry the sweatshirt in the dryer or hang it up to air dry. Avoid direct sunlight, which can fade the colors.
Tie-dyeing a sweatshirt is a fun and creative project that can be enjoyed by people of all ages. With these easy steps, you’ll be able to make a beautiful and unique sweatshirt that reflects your personal style!